Alright, so let me tell you about this whole Unicorn Academy shirt saga. It all started, as these things often do, with my kid. You know how they get obsessed with a show? Well, Unicorn Academy was IT. Suddenly, everything was unicorns, magic, and an urgent, life-or-death need for a shirt.
Naturally, I hit the internet. Figured it’d be easy, right? Type it in, click, buy. Done. Wrong. What I found was either super expensive, looked like it was designed by someone who’d only heard of unicorns in a blurry dream, or would take about six months to ship from some far-off land. Not ideal when you’ve got a kiddo asking every five minutes if her Unicorn Academy shirt has arrived yet.
My Grand Idea (or so I thought)
So, there I was, frustrated. Then, a little lightbulb went off. “I’ll just make one!” I declared, probably a bit too confidently. I mean, how hard could it be? I’ve seen those iron-on kits. Seemed straightforward enough. This was going to be my big DIY triumph.
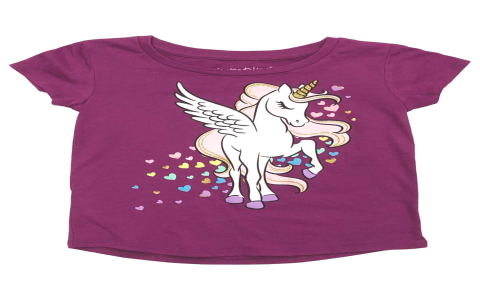
First stop, the craft store. I grabbed a plain t-shirt – pink, because of course. Then I hunted down some iron-on transfer paper. This stuff is like magic, or so I hoped. The next challenge was the design. I’m no graphic designer, that’s for sure. I spent a good hour searching for a decent, simple Unicorn Academy logo or image that wouldn’t look like a total blob when I printed it. Finally found something workable.
Then came the actual doing part. I printed the design onto the special paper. Crucial step: remembering to mirror the image! Nearly messed that up, which would have been a disaster. My kid would not have appreciated a “ymedacA nrocinU” shirt, I can tell you that much.
The ironing. Oh, the ironing. This was the real test of patience. You have to press down hard, keep the iron moving but not too fast, and make sure it’s hot enough but not TOO hot. I was so nervous I was going to scorch the shirt or melt the transfer into a gooey mess. I laid down an old pillowcase on the ironing board, put the shirt on top, placed the transfer paper design-down, and just went for it. I followed the instructions on the transfer paper packet like they were sacred texts. Press for this long, let it cool for that long.
- Got the plain shirt.
- Found and printed the design (mirrored!).
- Carefully positioned the transfer paper.
- Ironed it like my life depended on it.
- Peeled it back very, very slowly.
That peeling moment was intense. I held my breath. And… it actually worked! Mostly. There was one tiny corner that didn’t quite stick perfectly, but a quick touch-up with the iron sorted that out. It wasn’t professional, not by a long shot. The colors were maybe a bit faded compared to a store-bought one, and if you looked super close, you could see it was a DIY job.
But you know what? When my kid saw it, her eyes lit up. She didn’t care about the tiny imperfections. To her, it was THE Unicorn Academy shirt. She put it on immediately and pranced around like she was actually enrolling. That made all the fuss and near-panic worth it.
So yeah, that was my adventure into custom kid’s apparel. Sometimes, when the official merch fails you, or your wallet screams in protest, a bit of DIY, even if it’s a bit rough around the edges, does the trick. And honestly, there’s something pretty cool about making something yourself, even if it’s just an iron-on t-shirt. Gives you a bit of a “yeah, I did that” feeling.


