
Okay, so I’ve been wanting to try my hand at some bone carving for a while, and I finally took the plunge. I decided to go with a “carabao skull” theme – you know, those big water buffalo skulls? They have these awesome, sweeping horns, and I thought it would make a cool piece. I had no experience before, so I learned and practiced for a whole day, and I found it really interesting.
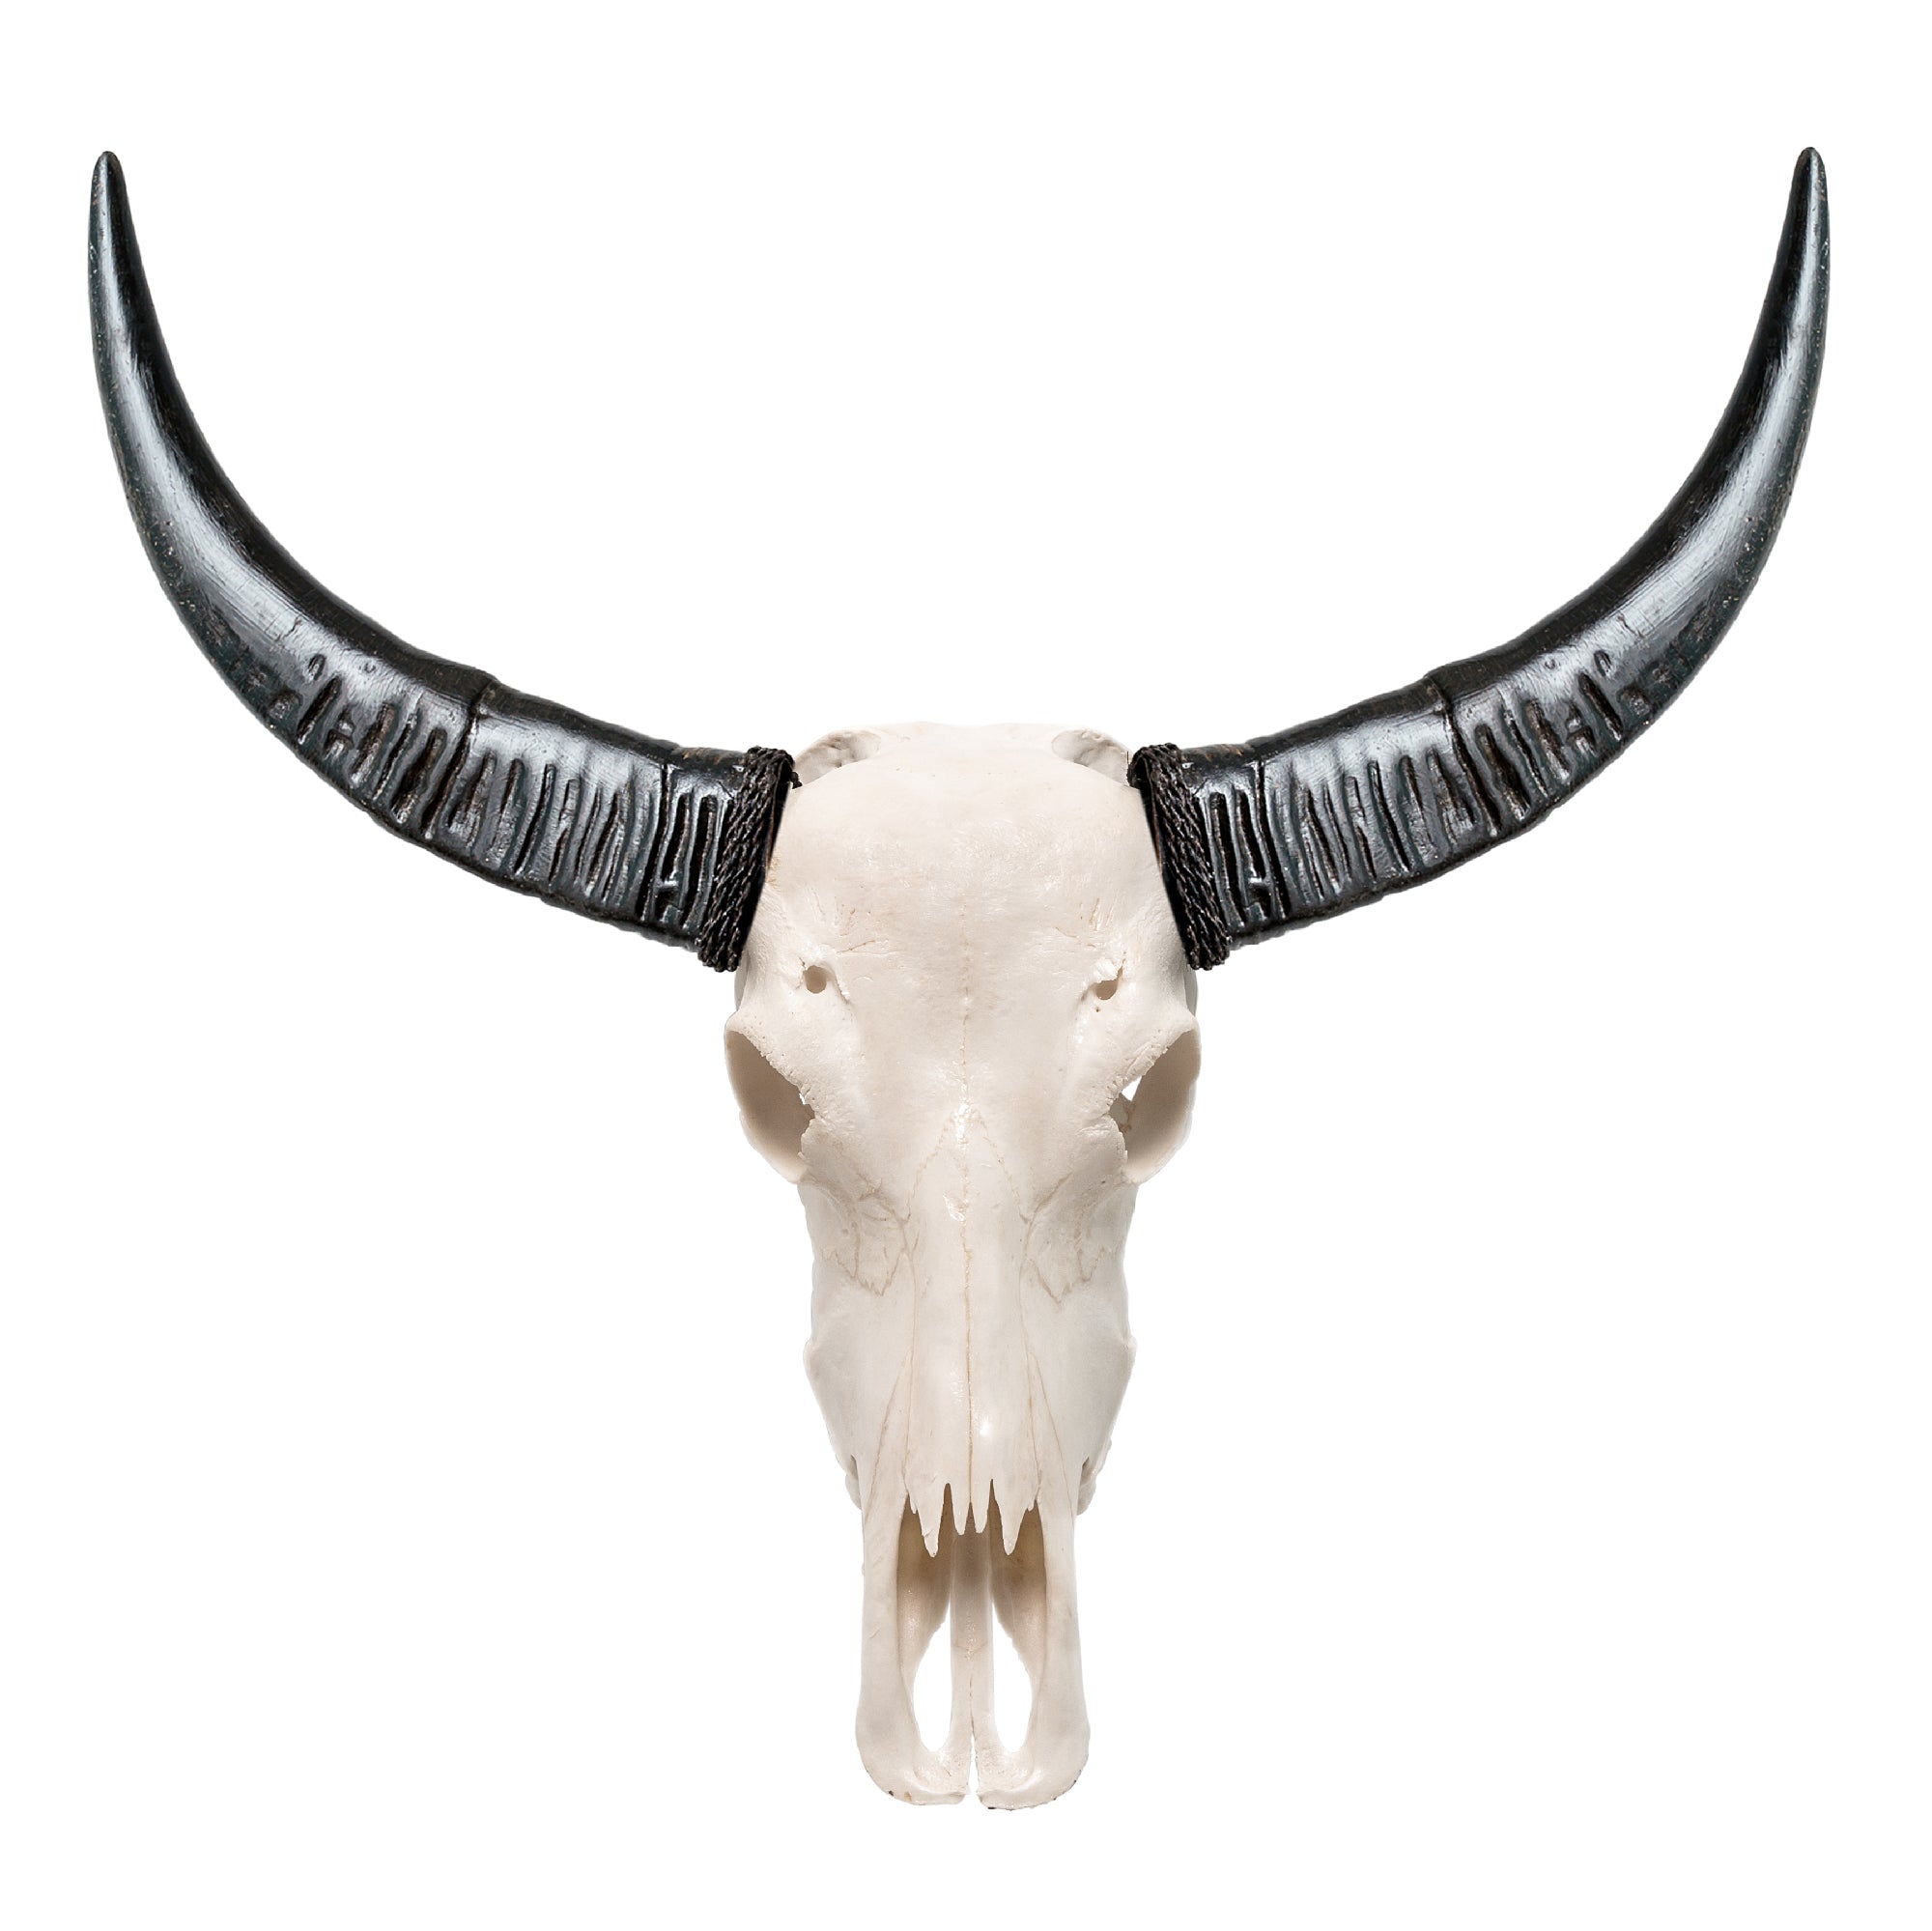
First things first, I needed a skull. Obviously, I wasn’t going to go out and, uh, acquire a real one. I found a pretty realistic-looking resin replica online. It wasn’t super cheap, but it was way more practical (and legal) than the alternative.
Getting Started
Once I had the skull, I needed some tools. I grabbed a basic carving set from a craft store – you know, the kind with a bunch of different-sized blades and gouges. I also got a Dremel tool, which is like a mini rotary tool, for some of the finer details. And, of course, safety glasses! Gotta protect the eyes.
- Resin Carabao Skull Replica
- Basic Carving Set
- Dremel Tool
- Safety Glasses
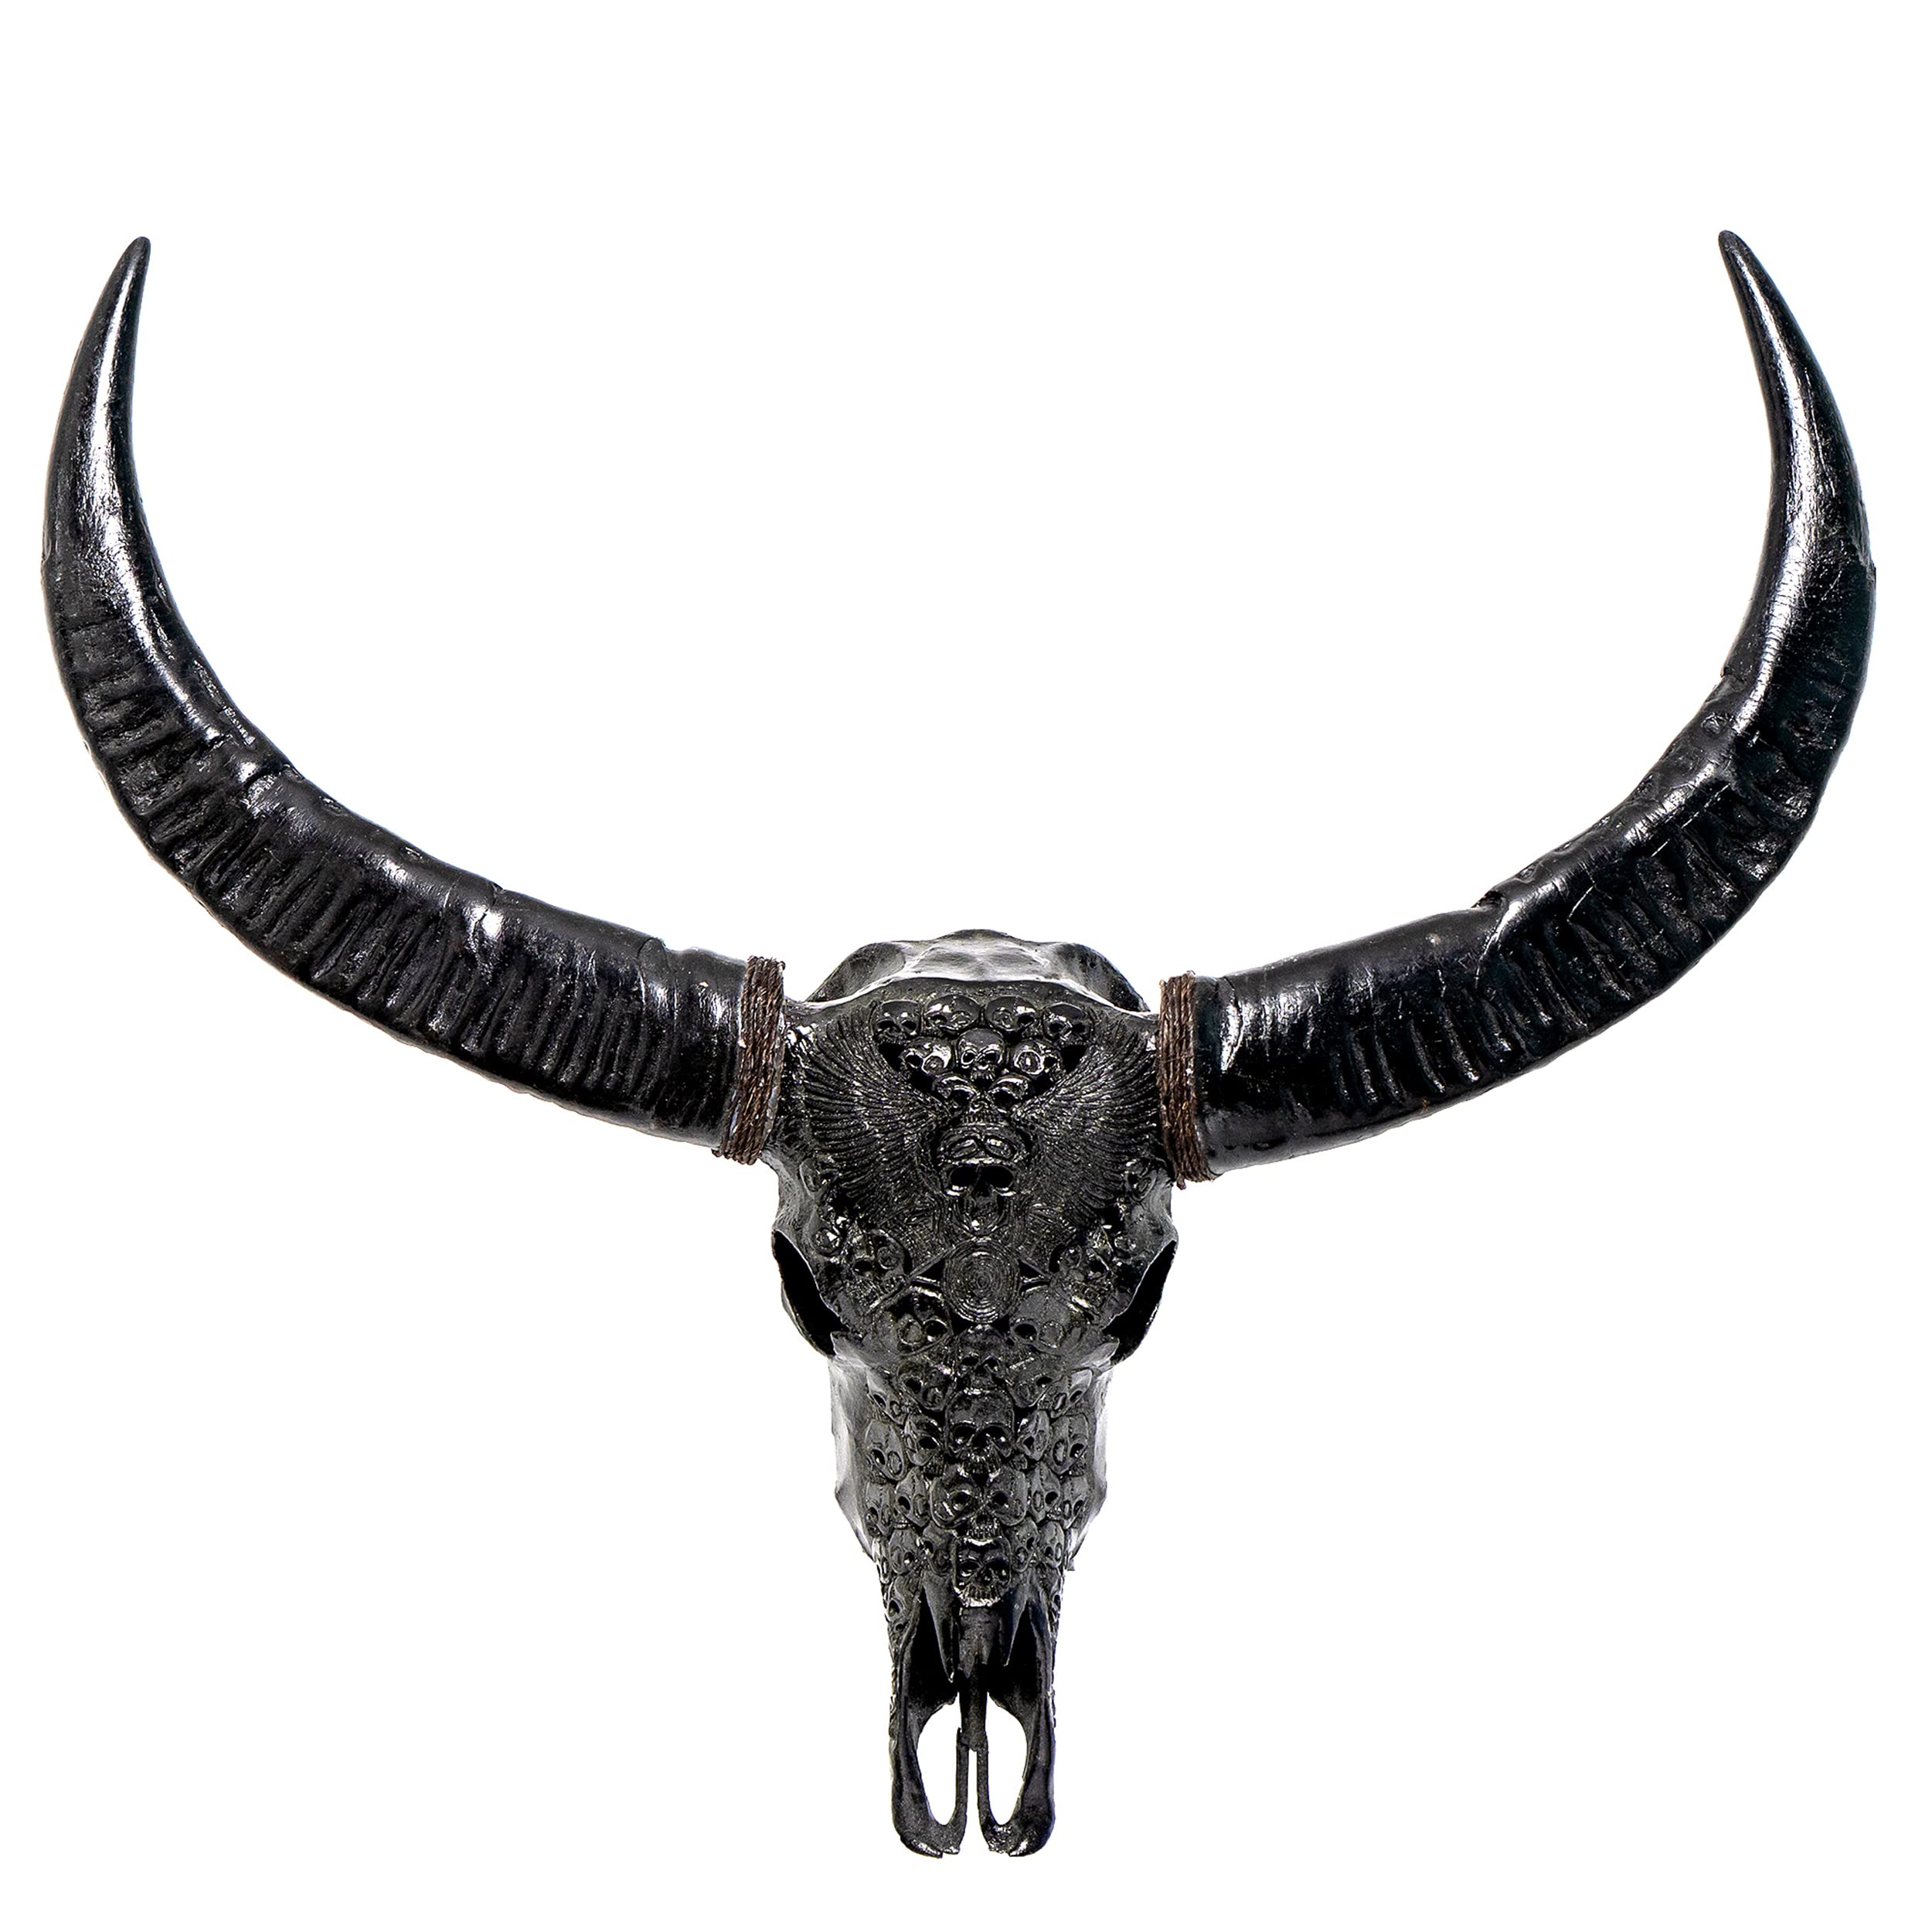
I spent some time just looking at pictures of real carabao skulls, getting a feel for the shapes and textures. Then, I lightly sketched out some designs on the resin skull with a pencil. I wanted to do some swirling patterns and maybe some floral stuff, keeping it kind of tribal-looking.
The Carving Process
I started with the larger gouges, slowly removing material to create the basic shapes. Man, it’s tougher than it looks! Resin is pretty hard, and you have to be careful not to chip it or take off too much at once. I definitely made a few mistakes, but hey, that’s part of learning, right?
The Dremel tool was a lifesaver for the smaller details. I used it to refine the edges of the carvings and add some texture. It’s pretty loud and kicks up a lot of dust, so I made sure to wear a mask, too. Don’t want to breathe that stuff in.
I worked on it for a few hours each day, taking breaks when my hands got tired. It’s definitely a slow process, but it’s also really satisfying to see the design gradually emerge. I found myself getting totally lost in it, which was a nice change of pace.
Finishing Touches
After cleaning the surface, I considered adding a bit of color, but I ended up liking the natural look of it.I used a polishing and buffing tool to smooth the surface.
It’s not perfect, but I’m pretty proud of it! It’s definitely a unique piece, and it was a fun project to learn a new skill. I’m already thinking about what I want to carve next. Maybe something a little smaller this time… my hands are still a bit sore!


