Okay, so I finally got around to messing with the carb on my Suzuki Savage. It’s been running a little rough, especially at lower RPMs, and I figured it was time to give it some TLC. Here’s how it went down.
First things first, I disconnected the battery. Always a good idea when you’re fiddling with anything electrical or fuel-related. Then, I started stripping things down. The fuel tank had to come off – pretty straightforward, just a couple of bolts and the fuel line. I made sure to drain the tank as much as possible beforehand to avoid a gas shower.
Next up was getting the carb off the bike. There were a few vacuum lines and the throttle cable to disconnect. I took pictures with my phone before disconnecting anything so I could remember where everything goes later. Seriously, that’s a lifesaver. The carb itself was held on with a couple of clamps. I loosened those up and with a bit of wiggling, the carb popped right off.
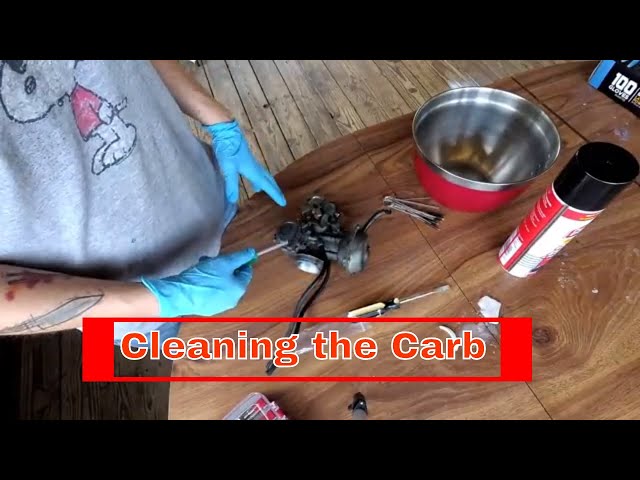
Once I had the carb on my workbench, I started taking it apart. I made sure to have a clean workspace and a tray to keep all the little parts organized. Carb cleaner is your best friend here. I sprayed everything down and let it soak for a bit to loosen up any gunk.
I pulled the float bowl off first. It was pretty nasty inside – lots of old fuel residue. I cleaned it up with carb cleaner and a small brush. Then I removed the float and the needle valve. The needle valve is super important – it controls the fuel flow into the bowl. I made sure it wasn’t worn or damaged. Luckily, it looked okay.
Next, I unscrewed the jets. There’s usually a main jet and a pilot jet. These are what control the fuel mixture at different throttle positions. I cleaned them out with a small wire and carb cleaner. If they’re clogged, the bike will run poorly.
I also checked the diaphragm. It’s a rubber piece that moves with the vacuum from the engine and controls the throttle slide. If it’s cracked or torn, it needs to be replaced. Mine looked okay, but I gave it a good cleaning anyway.
With everything cleaned and inspected, I started putting the carb back together. I made sure all the gaskets and O-rings were in good shape. If they’re old or cracked, they can cause leaks. I replaced a couple that looked a little suspect.
Putting the carb back on the bike was pretty much the reverse of taking it off. I reconnected all the vacuum lines and the throttle cable, making sure everything was snug but not overtightened. Then I put the fuel tank back on and hooked up the fuel line.
Finally, I reconnected the battery and fired up the bike. It took a few tries to get it started, but once it was running, it sounded much better. The idle was smoother, and it seemed to have more power at lower RPMs. I took it for a quick ride around the block, and it felt great!
It wasn’t a super difficult job, but it definitely made a difference. If your bike is running rough, cleaning the carb is a good place to start. Just take your time, be organized, and don’t be afraid to ask for help if you get stuck. And remember to take pictures before you disconnect anything!
Tools you’ll need:
- Screwdrivers
- Wrenches
- Carb cleaner
- Small brush
- Small wire
- New gaskets and O-rings (optional)
That’s pretty much it. Hope this helps someone out there!


