Alright, let’s talk about this “Lady Camelia photos” thing I got myself into.

Getting Started with the Camellias
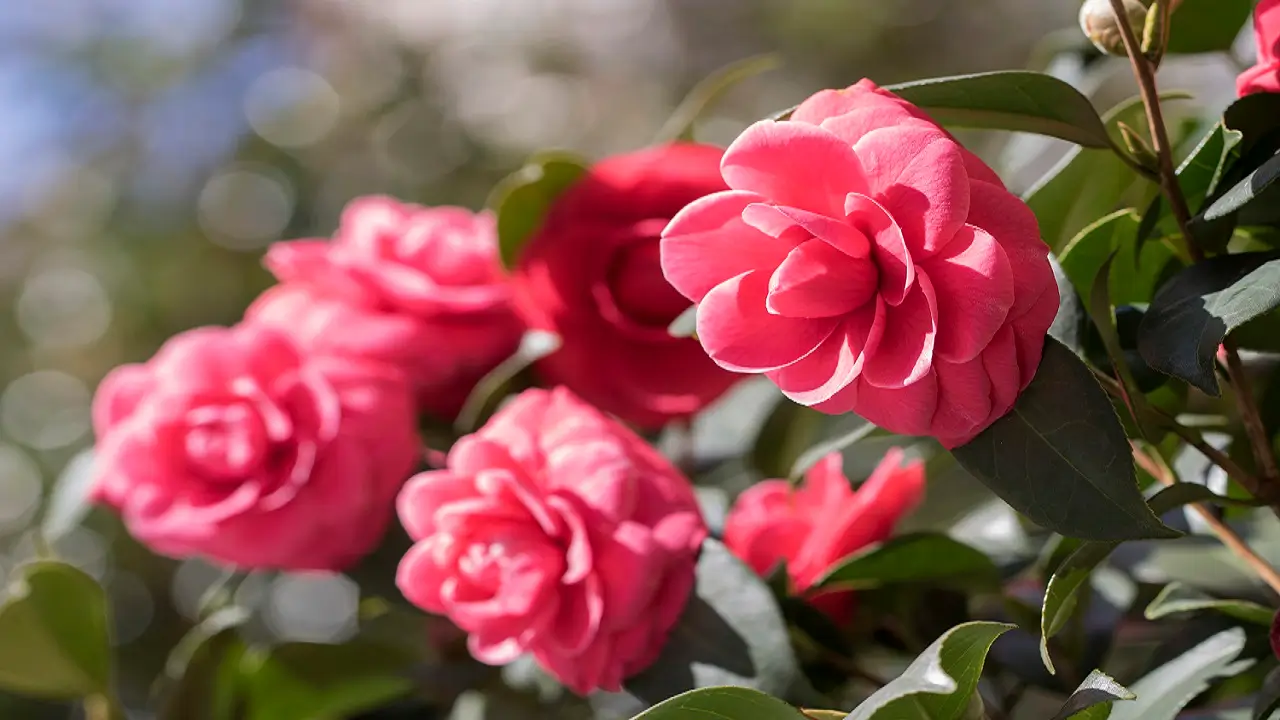
So, the other day, I looked out into the garden, and these camellias were just screaming for attention. Big, bold blooms, you know? And I thought, “Right, I’m gonna capture these. How hard can it be?” Famous last words, as always. I figured I’d just grab my camera and get some nice shots. Didn’t really plan much beyond that, to be honest. Sometimes you just gotta go with the flow, or so I tell myself.
I grabbed my usual gear. My trusty old DSLR, nothing too fancy. I did think about lenses for a second. I decided to stick with my 50mm prime for some shots, hoping for that nice blurry background, and maybe a macro if I got really ambitious. Most of the time, I end up just using one lens anyway, keeps things simple.
The Actual Process – Or, The Struggle
Okay, so I went out there. First problem: the light. It was that kind of midday sun that just washes everything out. Not ideal. I tried to find some flowers in the shade, but then they looked a bit dull. So I waited a bit, wandered around, had a cup of tea, hoping the light would get a bit softer later in the afternoon. Classic photographer problem, always chasing the light.
Then, when the light was a bit better, the wind picked up. Of course it did. Trying to get a sharp photo of a flower that’s dancing around like it’s at a disco? Not easy. I found myself holding my breath, trying to time the shot just right between gusts. My patience was definitely tested. I must have taken a hundred photos just to get a few that weren’t a complete blur.
I tried different angles.
- Shooting from below, looking up into the flower.
- Getting right down at eye level with the bloom.
- Trying to isolate a single perfect flower against a messy background. That was a challenge in itself.
I spent a lot of time just moving around, crouching, sometimes lying on the ground a bit to get the perspective I thought I wanted. My knees weren’t too happy about that, let me tell you. I was trying to get that “Lady Camelia” essence, whatever that means. Just trying to make them look as good as they did in person.
Some shots, I focused on the petals, the texture. Others, I tried to get the whole cluster. Some worked, many didn’t. That’s just how it goes. You see these perfect flower photos online and think it’s a piece of cake. Nah. There’s a lot of trial and error, a lot of deleting.
After the Shoot – The Digital Darkroom
So, I finally came inside, feeling like I’d been in a wrestling match with a bunch of flowers. I uploaded the photos to my computer. And then the real “fun” began. Sifting through them all. So many were just slightly out of focus, or the composition was a bit off, or a random leaf photobombed the shot.
I opened up my usual editing software. Nothing too complicated. I mainly just tweaked the exposure a bit on some, sharpened a few that were almost there. Cropped a couple to make the composition a bit tighter. I try not to overdo it with editing. I want them to look like real flowers, not something out of a cartoon. But you always gotta do a little something, right? To bring out what you saw with your own eyes.
The Outcome – Well, Here We Are
In the end, did I get any masterpieces? Probably not. But I got a few shots that I’m pretty happy with. They capture the camellias, I think. It was more about the process, the trying, the figuring things out on the fly. It’s always a learning experience, even with something as simple as taking photos of flowers in your garden.
So yeah, that was my little adventure with the “Lady Camelia photos”. A bit of frustration, a bit of satisfaction. Mostly, it was just me, my camera, and some rather uncooperative but beautiful flowers. And I guess that’s what it’s all about, isn’t it?


